


Kilimanjaro Photography Guide
How to choose a camera, protect batteries, manage power and capture summit photos without compromising safety.

Kilimanjaro Photography at a Glance
- A recent smartphone is enough for many climbers and is usually the lightest option.
- A compact camera or one mirrorless/DSLR body with a versatile lens offers more control without requiring a large system.
- Treat the mountain as off-grid. Do not depend on electrical charging at camps or in the Marangu huts.
- Cold temporarily reduces usable battery capacity and can cause a phone or camera to shut down.
- Keep spare batteries and your power bank dry, insulated and close to your body on cold days.
- Carry your camera, batteries and memory cards in your daypack; the portered duffel is normally inaccessible while you walk.
- Use two layers of water protection: a protective camera pouch inside a dry bag or waterproof liner.
- Avoid changing lenses in rain, wind or volcanic dust.
- Prepare summit settings and controls before leaving high camp.
- Never leave the trail, remove essential warm clothing or delay the group for a photograph.
What Camera Should You Take Up Kilimanjaro?
There is no single best Kilimanjaro camera. The right choice depends on your photographic ambition, tolerance for weight, familiarity with the equipment and plans after the climb.
| Option | Best for | Main advantages | Main limitations |
|---|---|---|---|
| Smartphone | Most climbers | Light, always accessible, strong automatic processing and easy video | Cold-sensitive battery, limited optical reach and awkward use with thick gloves |
| Compact or rugged camera | Travellers wanting more reach without a large kit | Small, often has optical zoom; some models offer genuine weather resistance | Small battery and controls; weather sealing varies by model |
| Mirrorless camera | Enthusiasts and professionals | Excellent image quality, interchangeable lenses and strong video | Electronic viewfinder and screen use power; lenses add weight |
| Option | Best for | Main advantages | Main limitations |
|---|---|---|---|
| DSLR | Photographers who already know their system | Excellent image quality, physical controls and an optical viewfinder | Usually the heaviest and bulkiest option |
| Action camera | Short video clips and wide-angle sequences | Small, stabilized and easy to mount or hand-hold | Tiny batteries suffer in cold; very wide perspective is not ideal for every scene |
Take equipment you already know. Kilimanjaro is a poor place to learn an unfamiliar menu system or discover that gloves prevent you from reaching an important control.
Is a Smartphone Good Enough?
For most personal travel stories, yes. Modern phones handle daylight landscapes, panoramas, portraits and stabilized video extremely well. They also remove the burden of a separate camera and charger.
Before travelling:
- Clean the camera lenses and check that your case does not obstruct them.
- Free enough storage for photographs and video.
- Learn the lock-screen camera shortcut so you do not need to remove gloves for long.
- Set the correct date and time zone.
- Download any manuals or reference notes for offline use.
- Decide whether you want standard files, higher-resolution files or RAW capture; larger formats consume storage quickly.
- Test airplane mode, low-power mode and any settings that disable automatic uploads or background activity.
Airplane mode can reduce unnecessary power use, but a phone must never be treated as a replacement for your guide, route management or emergency procedures.
When a Dedicated Camera Is Worth It
A dedicated camera makes sense when image quality is a major reason for your trip, when you intend to print large photographs, or when you want greater control in low light. A single body and one versatile zoom is often the most practical system. It minimizes lens changes and keeps the daypack manageable.
Before packing a second body, multiple lenses, a large tripod or a drone, ask two questions: will the item materially improve the work, and can you still carry it comfortably with water, waterproofs, insulation and personal essentials? Your porter carries the main duffel, but you carry the camera system in your own daypack throughout the trekking day.
If a safari follows the climb, a telephoto lens may be extremely useful there but unnecessarily heavy on Kilimanjaro. Discuss secure pre- and post-climb luggage arrangements with our team rather than automatically carrying every safari lens up the mountain.
A Practical Camera Kit
For a lightweight setup, consider:
- Smartphone, compact camera, or one mirrorless/DSLR body
- One versatile lens and fitted lens hood
- Two or more charged camera batteries, adjusted to your camera and shooting habits
- High-quality power bank of an airline-compliant capacity
- Short, reliable charging cables plus one spare cable
- More memory-card capacity than you expect to use
- Two small waterproof pouches: one for charged batteries and one for used cards
- Microfibre lens cloth and manual air blower
- Protective camera wrap or padded insert
- Daypack waterproof liner or dry bag
- Simple wrist strap or secure camera strap
- Optional lightweight mini-tripod for use around camp
Do not buy a large system simply because the trip is important. Extra weight becomes more noticeable as altitude, cold and fatigue increase.
Batteries, Power Banks and the Cold
Cold is one of the most common reasons electronics appear to fail on summit night. Lithium-ion batteries deliver less usable energy at low temperature. A phone may report a rapid fall in charge or switch off even though energy remains. Performance often returns after the battery warms.
Apple states that iPhone and iPad are designed for use between 0°C and 35°C (32°F to 95°F); use outside that range can temporarily shorten battery life or cause the device to turn off, and charging may pause when the device is too cold. Your own camera and battery may have different limits, so read the manufacturer’s instructions before departure. Apple: temperature and device performance
How to Keep Batteries Working
- Begin every trekking day with fully charged devices and batteries.
- Carry spare batteries in an inner jacket pocket during cold sections.
- Keep the power bank insulated in the centre of your daypack or close to your body.
- Separate batteries from damp gloves, water bottles and condensation.
- Rotate a cold battery with a warm spare instead of repeatedly switching the camera on.
- Turn off Wi-Fi, Bluetooth, automatic image transfer and long image-review times when not needed.
- Reduce phone-screen brightness and avoid unnecessary video playback.
- Put the camera away between photographs on summit night rather than leaving it exposed.
- Allow an extremely cold device or battery to warm gradually before charging it.
Never place a battery directly against a hot-water bottle, heater or open flame. Sudden heat, water and physical damage create risks of their own. Do not use swollen, cracked, recalled or otherwise damaged batteries.
How Large Should Your Power Bank Be?
A 10,000–20,000 mAh power bank is a common starting range, but its label does not tell you exactly how many phone charges you will receive. Conversion losses, cable quality, device use, age and temperature all affect real performance. Photographers using a mirrorless camera for video may need more energy than a climber taking occasional phone photographs.
Choose a reputable unit with its watt-hour rating clearly marked. Bring the shortest cables that reliably fit your devices, and test the entire charging system before flying. At your Moshi hotel, complete a final charge during the arrival and briefing period; once the trek begins, treat any unexpected charging opportunity as a bonus rather than part of the plan.
Flying With Camera Batteries and Power Banks
Spare lithium batteries and power banks must be carried in cabin baggage, not checked baggage. Their terminals must be protected from short circuit. The U.S. Federal Aviation Administration’s passenger guidance limits most rechargeable lithium-ion batteries to 100 watt-hours each; batteries from 101 to 160 Wh require airline approval and the larger category is limited to two spares. Airlines may apply stricter limits, including rules about the number, location and in-flight use of power banks. Always check every carrier on your itinerary. FAA PackSafe: lithium batteries
To prepare batteries for travel:
- Leave them in retail packaging, use an individual battery case or cover exposed terminals with tape.
- Keep each spare battery or power bank protected from metal objects and physical damage.
- Remove power banks and spare batteries if a cabin bag is taken for gate checking.
- Do not fly with damaged, swollen or recalled batteries.
- Confirm airline rules shortly before departure because policies can change.
To calculate watt-hours when only voltage and capacity are shown:
Wh = volts × amp-hours
For a label in milliamp-hours, divide mAh by 1,000 to obtain amp-hours first. For example, a 20,000 mAh bank rated at 3.7 V is approximately 74 Wh. Use the manufacturer’s marked rating when available.
Charging on Kilimanjaro
Plan for no electricity on the mountain. Tent camps do not offer dependable guest charging, and the huts on the Marangu Route should not be treated as charging stations. Mobile coverage can also be absent or inconsistent.
Your power plan should therefore be complete before the trailhead:
Charge every device, battery and power bank at the hotel.
Verify that every cable and adapter works.
Put your phone in airplane or low-power mode where appropriate.
Decide how much still photography and video you genuinely need.
Keep a reserve specifically for summit night and descent.
A solar panel can work under favourable conditions, but sunlight, orientation, weather, hiking pace and conversion efficiency make it unreliable as the only solution. For most climbers, charged spare batteries and a good power bank are simpler and lighter.
Protecting Cameras From Rain, Dust and Condensation
Kilimanjaro presents several different equipment hazards. The forest can be wet; the moorland can bring mist and rain; the alpine desert is dusty and windy; and the upper mountain can be cold, snowy or icy.
Use two layers of protection. Put the camera in a padded pouch or wrap, then place that inside a roll-top dry bag or waterproof daypack liner. A pack rain cover helps, but wind can lift it and water can still enter around straps and zips.
Carry a clean microfibre cloth for the front element and a manual blower for dust. Do not blow onto the sensor or lens with your mouth, because breath contains moisture. Avoid changing lenses when rain, wind or volcanic dust is present. A fitted lens hood helps shield the front element from light rain and accidental contact, but it is not a substitute for waterproof storage.
Preventing Condensation
Condensation forms when a cold camera meets warmer, humid air. At the end of a cold session, seal the camera in a dry bag before entering a warmer tent, hut, vehicle or hotel. Let it warm gradually while still sealed so moisture forms on the outside of the bag rather than inside the equipment. Do not open compartments or remove the lens until the temperature has equalized.
If equipment becomes wet, switch it off, remove the battery when the manufacturer’s instructions allow, and let it dry slowly. Never assume “weather sealed” means waterproof; protection levels vary by model and depend on the lens and accessories as well as the body.
Where to Find Kilimanjaro’s Best Photo Opportunities
Conditions and itineraries vary, and cloud can hide the mountain at any time. Still, each route has a distinctive visual character.
Lemosho Route
Lemosho offers rainforest, the open Shira Plateau, broad western perspectives, volcanic formations around Lava Tower and the dramatic approach to Barranco. Its longer itineraries also create more days in which changing light may reveal Kibo.
Machame Route
Machame moves through forest to Shira, Lava Tower, Barranco and the southern circuit. Barranco Wall, glacial views and the contrast between vegetation and alpine desert provide strong storytelling sequences.
Northern Circuit
The Northern Circuit is known for broad landscapes and the quieter northern side of the mountain. Depending on weather and camp sequence, photographers may find distinctive views towards Mawenzi and more space for environmental portraits.
Rongai Route
The northern approach is generally drier and offers a different perspective of Kilimanjaro. Mawenzi and the open Saddle can be especially striking, but wind and dust require careful equipment protection.
Marangu Route
Marangu’s huts give the visual story a different character. Forest scenes, Mandara, Horombo, the Saddle and the approach through Gilman’s Point provide a clear documentary sequence. Huts do not remove the need for cold-weather battery planning.
Umbwe Route
Umbwe’s steep, forested opening and direct approach can feel dramatic. The physical demands make a very light, accessible camera system particularly important.
Ask your guide about the day’s terrain and likely stopping points. Camp names, timings and viewpoints can differ between itineraries, and safe opportunities always depend on weather, trail traffic and the condition of the group.
Photographing Camp Life and the Mountain Crew
The complete Kilimanjaro story includes much more than the summit sign. Photograph the trailhead, boots after rain, water preparation, meals, changing vegetation, tents or huts, shared laughter and the quiet moments before summit night.
People are not scenery. Ask before making close portraits of guides, cooks, porters, other climbers or local residents. A friendly gesture is not automatically consent for commercial use. Do not interrupt work, ask someone to repeat a difficult task or stage unsafe behaviour. If images will be used in advertising, a documentary or another commercial project, discuss permissions and releases with Tanzania Inside Safari before the climb.
Simple Camera Settings for Kilimanjaro
These are starting points, not fixed recipes. Light, lens, stabilization, movement and camera performance vary.
| Situation | Useful starting point | What to watch |
|---|---|---|
| Daylight landscape | Aperture priority, f/5.6–f/8, Auto ISO, exposure compensation as needed | Protect bright cloud, snow and glacier detail from overexposure |
| People on the trail | 1/250 sec or faster, f/4–f/5.6, Auto ISO | Focus on the nearest eye and keep enough depth for a group |
| Fast camp moments | Shutter priority around 1/500 sec or camera action mode | High ISO may add noise, but blur loses the moment entirely |
| Pre-dawn portrait | Wide aperture, approximately 1/60–1/125 sec, high ISO | Check face sharpness; headlamps can create extreme contrast |
| Stars from camp | Wide lens, f/1.8–f/2.8, 10–20 sec, ISO 1600–3200 | Use a stable support, focus manually and review stars for movement |
| Video | 1080p for efficiency; 4K only when you need it | 4K consumes more battery and storage |
RAW files preserve more editing flexibility but require more storage and post-production. JPEG or HEIF is simpler for immediate sharing. RAW+JPEG provides both, at the cost of space and slower transfers.
Summit-Night Photography
Most summit attempts begin around midnight. You may be tired, cold and operating at high altitude, so simplify everything before leaving high camp.
Prepare Before You Sleep
- Select one lens and avoid changing it during the ascent.
- Insert a charged battery and place warm spares in an inner pocket.
- Clear sufficient memory-card and phone storage.
- Set a practical exposure mode and test it in darkness.
- Turn off unnecessary wireless connections and long image review.
- Attach a secure wrist or neck strap.
- Place the camera where you can reach it without unpacking essential layers.
- Practise controls while wearing the gloves you will use.
Do not hang an exposed camera outside your jacket for the entire ascent. It will become cold, collect dust or moisture and swing against rock. Stop only where the guide says it is safe.
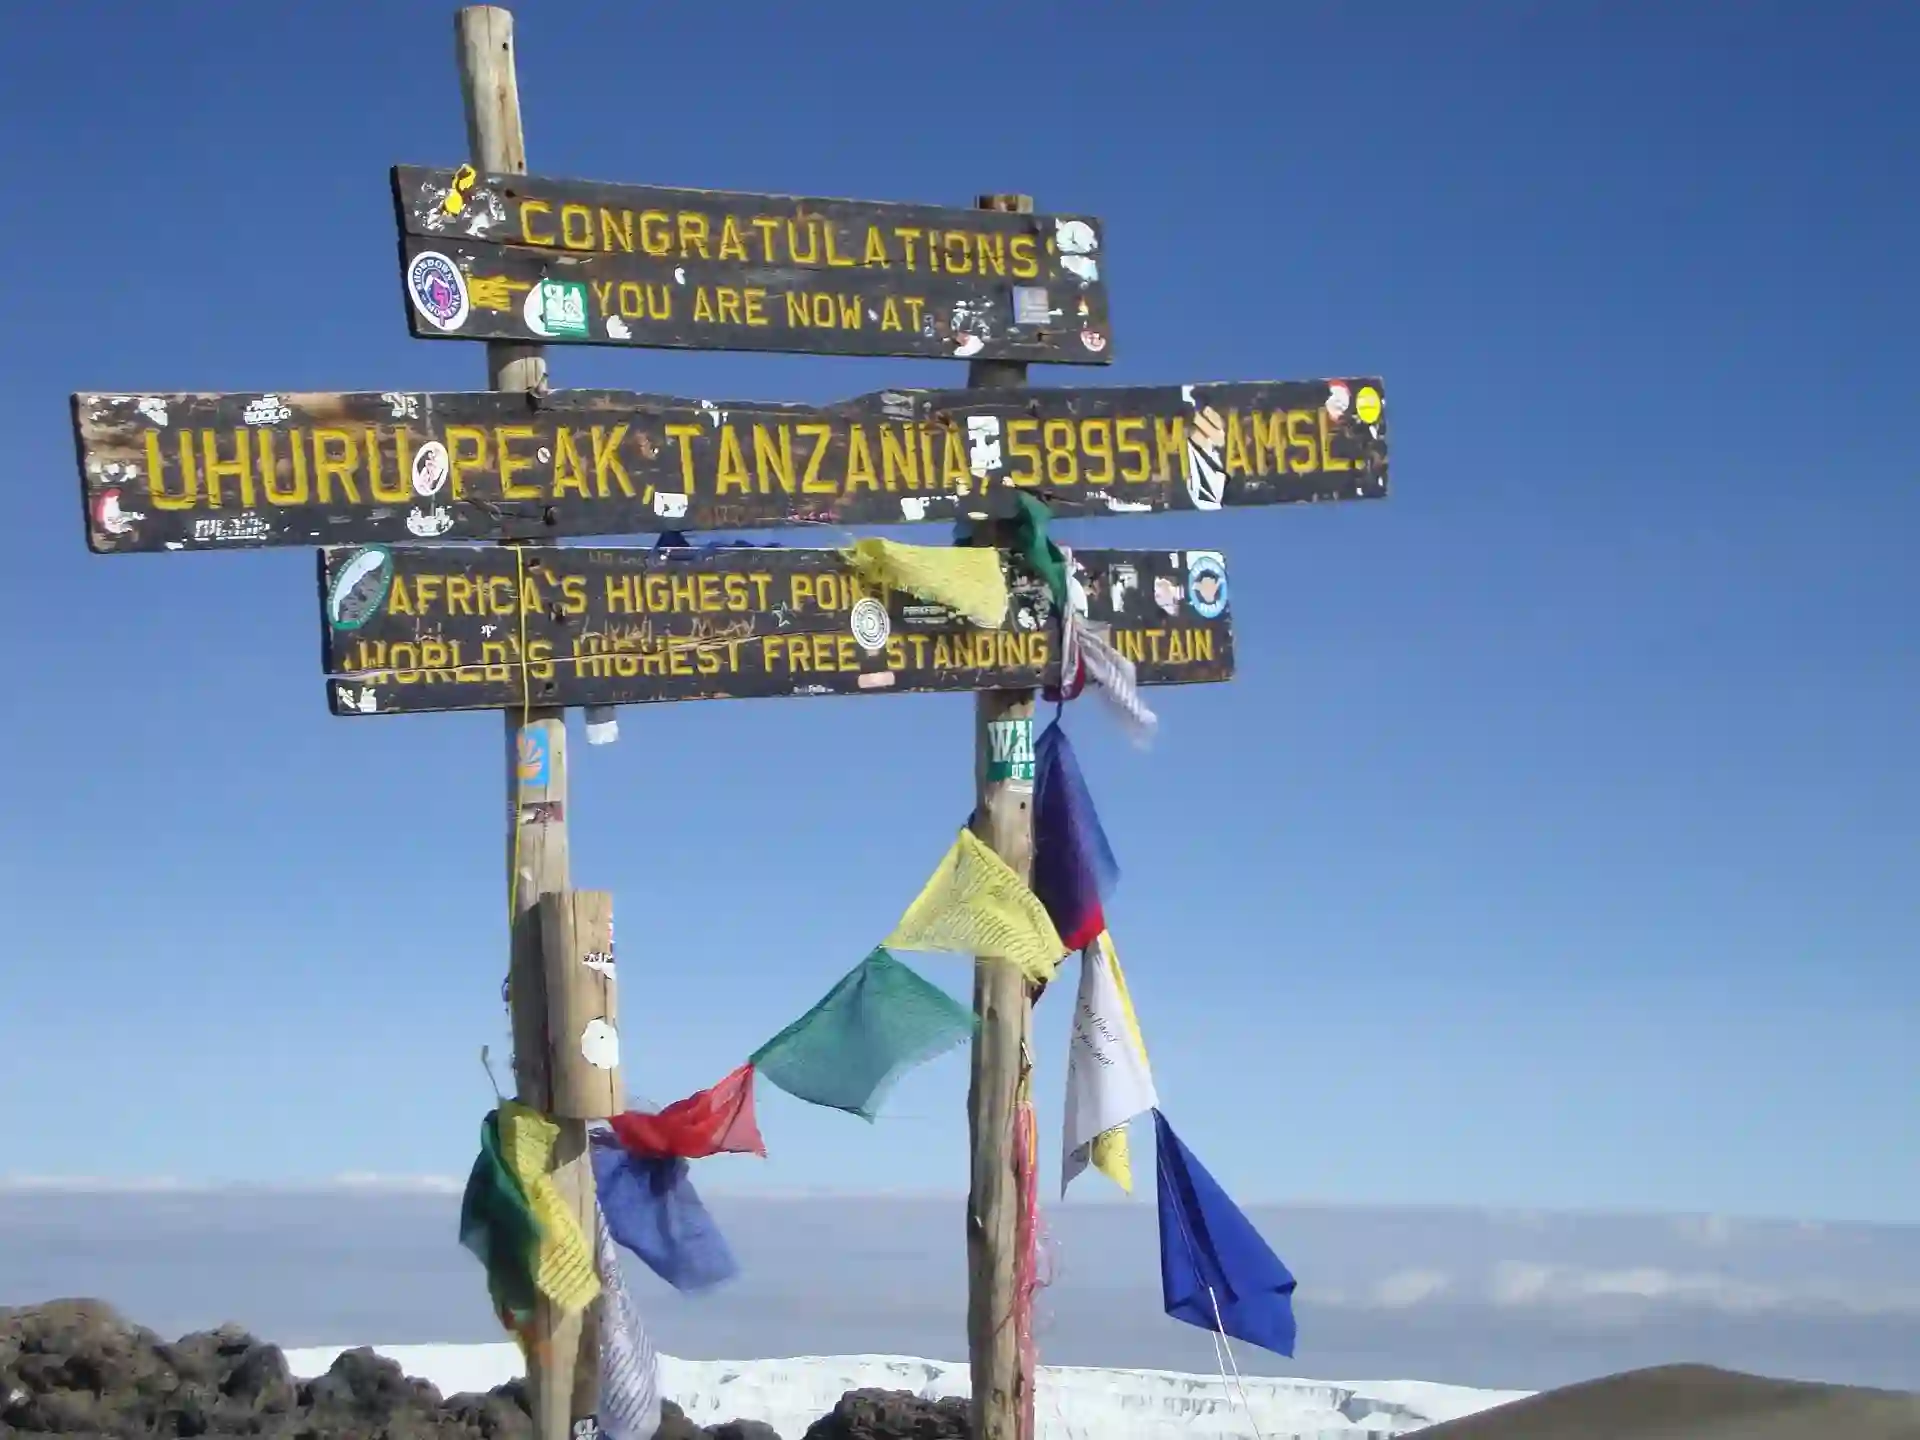
At Stella Point, Gilman’s Point and Uhuru Peak
Reaching a crater-rim point and reaching Uhuru Peak are different achievements, so caption images accurately. Weather, health, time and trail conditions may determine where a climber turns around.
At any summit point:
- Keep essential gloves and insulation on.
- Stand on stable ground and remain on the established route.
- Take a full-length image, a closer portrait, a group image and a wider landscape if time allows.
- Make one short video clip rather than many long recordings.
- Ask your guide or another climber before handing over equipment.
- Accept other people in the frame when the sign is busy.
- Put the camera away promptly and continue or descend as instructed.
There is no photograph worth delaying an urgent descent. Confusion, loss of coordination, breathlessness at rest or a rapidly worsening condition requires immediate guide attention—not another take.
Smartphone Tips for Summit Photos
- Keep the phone in an inside pocket, preferably in a small dry pouch.
- Use the physical volume button as a shutter if your phone supports it.
- Avoid digital zoom; make a normal image and crop later.
- Wipe the lens before the key photograph.
- Lock focus and reduce exposure slightly if snow or bright dawn sky is losing detail.
- Use night mode only when you can stand safely and the phone can remain still.
- Record short video clips to conserve power and storage.
- Do not keep the screen at maximum brightness longer than necessary.
If a cold phone switches off, place it in a dry inner pocket and let it warm gradually. Do not heat it directly and do not charge it while it remains extremely cold.
Memory Cards and Backups
Equipment can be replaced; the story of your climb cannot. Use reliable memory cards purchased from a reputable seller and format them in the camera before the trip, after confirming that all previous files have been copied.
On the mountain:
- Use more than one card so the entire climb is not stored in one place.
- Keep used cards in a waterproof case separate from the camera.
- Lock completed SD cards if appropriate.
- Do not delete large batches of images while tired or cold.
- Avoid depending on mobile data or cloud uploads.
- If your camera has two card slots, consider simultaneous backup when the model supports it.
Back up photographs at the Moshi hotel after the descent. Keep one copy on the original card until another copy has been checked. Tanzania Inside Safari packages include a decompression day after the trek, giving climbers time to rest, organize equipment and review images before the next stage of the journey.
Photography After Kilimanjaro
Many climbers combine the mountain with a wildlife safari, chimpanzee trekking, cultural experiences or a Zanzibar beach holiday. Each requires a different photographic approach.
A safari may justify a longer telephoto lens and a beanbag; chimpanzee trekking favours fast focusing and careful low-light technique; Zanzibar rewards a compact, weather-protected setup; cultural photography requires especially clear consent and respectful interaction. Tanzania Inside Safari can coordinate these extensions and help you plan when specialist equipment is actually useful.
If you will not use a heavy safari lens on the climb, discuss how it can be stored and reunited with you afterward. Confirm luggage allowances for any domestic flights because they may be lower than those for your international journey.
Common Kilimanjaro Photography Mistakes
- Carrying a heavy system that makes the daypack uncomfortable
- Depending on camp electricity or uncertain mobile coverage
- Leaving spare batteries in the portered duffel
- Allowing batteries, cards and cables to become mixed or damp
- Changing lenses in wind, rain or volcanic dust
- Bringing untested chargers, adapters or cables
- Exposing a cold camera directly to warm, humid air
- Using digital zoom instead of moving or cropping when safe
- Filming so much video that storage and battery disappear before summit night
- Asking the group to wait or stepping away from the trail for a photograph
- Prioritizing the summit sign over symptoms, warmth or guide instructions
Frequently Asked Questions
Will I be able to charge my phone or camera on Kilimanjaro?
Do not plan on it. Arrive with everything charged and carry sufficient batteries or power-bank capacity for your itinerary. Charging facilities at tent camps and Marangu huts are not dependable guest services.
How many spare camera batteries should I take?
There is no universal number. It depends on the camera, itinerary length, temperature, video use and your shooting volume. Test how long one battery lasts in normal use, then add a generous cold-weather reserve. Serious photographers commonly carry several charged spares.
Should I bring a tripod?
A full-size tripod is rarely necessary for a standard climb and adds noticeable weight. A small stable support can be useful for stars or camp scenes. Do not set up a tripod where it blocks the trail, interferes with camp work or delays the group.
Can my guide take my summit photograph?
Guides can often help when conditions, group responsibilities and safety allow, but this should never be guaranteed. Make your camera simple to operate and show a companion how to use it before summit night.
Is it safe to use a camera in snow or rain?
Only within the protection limits of the specific camera and lens. “Weather resistant” is not the same as waterproof. Use a cover, keep exposure brief and return the system to a dry bag.
Should I bring a drone?
Do not assume that a drone may be imported, operated or flown inside Kilimanjaro National Park. Aviation and protected-area permissions can be complex and change. Obtain all required written approvals well in advance or leave the drone at home. Never launch one without explicit authorization and guide coordination.
Our Approach to Photography on Kilimanjaro
At Tanzania Inside Safari, photography can be part of the climb plan without becoming a safety problem. Tell us whether you are travelling with a phone, a compact camera or professional equipment, and whether the images are personal or commercial.
Our included arrival day and separate briefing and gear-check day provide time to test equipment, confirm cables, charge batteries, review the daypack and discuss realistic photo opportunities. During the trek, the guide’s instructions, the group’s pace, the weather and each climber’s health determine when stopping is appropriate.
We do not guarantee views, electrical charging, mobile coverage, battery performance or a crowd-free summit photograph. We do promise honest planning and decisions that keep acclimatization, warmth and safe descent ahead of content creation.
Plan Your Kilimanjaro Photography Journey
Tell us your route, travel dates, camera system and plans after the mountain. We can help you balance photography goals with a practical daypack and coordinate a wider Tanzania journey that may include safari, chimpanzee trekking, cultural tours or Zanzibar.
Final Photography Check Before the Trailhead
- Camera, phone and power bank fully charged
- Correct batteries, cables and plug adapter tested
- Airline-compliant spare batteries protected in cabin baggage
- Date, time zone and file format confirmed
- Memory cards formatted only after previous files are backed up
- Enough free phone and card storage for the full itinerary
- Camera controls tested while wearing gloves
- Charged and used batteries stored in clearly different pouches
- Camera packed in a padded pouch inside waterproof protection
- Summit-night reserve battery identified and kept separate
- Photography priorities discussed at the briefing
- Safety, consent and guide instructions understood