


Kilimanjaro Foot-Care Guide: Preventing Blisters, Swollen Feet and Toenail Injuries
Protect your feet on Kilimanjaro with practical advice on preventing blisters, managing swelling, protecting toenails and treating hot spots early.
Kilimanjaro Foot Care at a Glance
Your feet carry you through rainforest mud, volcanic rock, summit scree and a long descent from almost 6,000 metres. A small hot spot that seems unimportant on the first day can become a painful blister by the next camp. Tight boots can become uncomfortable as feet swell, while repeated toe impact during descents can bruise toenails or cause them to loosen.
Most trekking-related foot problems are easier to prevent than to treat. The foundations are simple:
- Wear properly fitted, broken-in boots.
- Use tested moisture-wicking socks.
- Keep feet as clean and dry as conditions allow.
- Stop as soon as you notice rubbing, burning or pressure.
- Adjust lacing before long ascents and descents.
- Tell your guide early instead of hiding a problem.
Foot care is not separate from summit preparation. Pain changes the way you walk, wastes energy and can make an already demanding descent less stable. Early action protects both comfort and safety.
- Never begin the climb in new or poorly tested boots.
- Your heel should remain secure, while your toes must not touch the front on descents.
- Use wool-blend or synthetic hiking socks rather than cotton.
- Test liner socks, insoles, tape and lubricants during training—not for the first time in Tanzania.
- Stop immediately when you feel a hot spot, rubbing or unusual pressure.
- Change damp socks when practical and keep one clean, warm pair protected for summit night.
- Retighten your boots before long descents to reduce forward sliding.
- Trim toenails straight across, leaving them level with or just beyond the end of the toe.
- Do not puncture a blister or drill a bruised toenail with improvised equipment.
- Report spreading redness, pus, severe swelling, numbness, inability to bear weight or worsening pain.
- Sudden one-sided leg or foot swelling, chest pain or breathlessness requires urgent medical assessment.
Why Foot Problems Are Common on Kilimanjaro
Kilimanjaro combines several conditions that increase friction and pressure inside footwear.
Consecutive Trekking Days
A boot that feels acceptable for a short weekend walk may become uncomfortable after several long days. Repeated movement can irritate the same point on the heel, toe or forefoot thousands of times.
Moisture
Rainforest humidity, rain, sweat and wet ground soften the outer layers of skin. Damp skin is more vulnerable to friction and damage.
Dust and Grit
Fine volcanic dust, sand or small stones inside a sock act like abrasive material. A wrinkle or grain of grit can create a blister during a long day.
Temperature Changes
Feet may sweat on the warm lower slopes and then become very cold near the summit. Climbers sometimes add thick socks without checking whether the boots still have enough room, increasing pressure and reducing circulation.
Swelling
Feet can expand during long periods of standing and walking. Heat, exertion, individual physiology, medication and health conditions can also contribute. A close-fitting boot in the morning may feel tight later in the day.
Long Descents
The descent from the summit is demanding. If the heel is not held securely, the foot repeatedly slides forward and the toes strike the boot. This can cause blisters, bruising beneath the nail and eventually nail loss.
Start With Properly Fitted Boots
No tape or blister dressing can compensate for boots that are fundamentally the wrong shape or size.
For most climbers on standard routes, we recommend light- to mid-weight waterproof trekking boots with:
- A secure heel
- Enough width across the forefoot
- Space for the toes to move
- A supportive but walkable sole
- Reliable tread
- Room for hiking socks without compression
- No sharp pressure point around the ankle, arch or instep
Test the boots late in the day when your feet are more likely to be expanded. Wear the socks, insoles or orthotics you intend to use on the mountain. Walk uphill and downhill, not only across a flat shop floor.
Your toes must remain clear of the front during descent. Excessive heel lift is also a warning sign because it creates friction. Learn more in our Best Hiking Boots for Kilimanjaro guide.
Break In the Complete Footwear System
Breaking in is not simply about making boots softer. It is your opportunity to test how the boots, socks, insoles, lacing and feet work together.
Progress from:
- Wearing the boots indoors
- Short local walks
- Longer walks on uneven ground
- Sustained uphill and downhill hiking
- A full day with your Kilimanjaro daypack
- Back-to-back training days
During training, note exactly where your feet become warm, damp, red or tender. A recurring hot spot is valuable information: it gives you time to adjust the boot, lacing or prevention method before the expedition.
Do not rely on one painless walk. Some problems appear only after several hours or on the second consecutive day.
Choosing Socks for Kilimanjaro
Socks manage moisture, cushion pressure and reduce direct rubbing between the skin and boot.
Recommended Materials
Choose merino-wool blends or technical synthetic fibres. These materials generally move moisture away from the skin more effectively than cotton and retain useful insulation when damp.
Avoid cotton. It absorbs moisture, dries slowly and can remain cold and abrasive against the skin.
Sock Thickness
A medium-weight hiking sock works well for many trekking days. A warmer pair can be reserved for summit night, provided it fits without making the boot tight.
More thickness is not automatically better. Overcrowding the toe box can increase friction, cause numbness and reduce circulation.
Liner Socks
Some climbers find that a thin liner sock under a hiking sock reduces friction at the skin. Others find that the extra layer creates heat, folds or pressure.
Use liners only if you have tested the exact combination on long training walks. Do not introduce them at the trailhead because another climber recommends them.
How Many Pairs?
A practical system normally includes:
- Several pairs of trekking socks
- One clean, warm summit pair stored in a waterproof bag
- One clean pair for sleeping
- Optional tested liner socks
Your final number depends on route length and your ability to dry socks. Consult the complete Kilimanjaro packing list when preparing the full equipment system.
Keep Feet Dry—but Do Not Chase Impossible Perfection
On a multi-day mountain trek, feet will sometimes become damp. The goal is to control moisture and prevent prolonged exposure.
During the Day
- Wear waterproof boots suitable for the forecast and terrain.
- Use gaiters to reduce rain, mud, scree and grit entering through the cuff.
- Wear waterproof overtrousers over the boot cuff in sustained rain.
- Remove grit or a folded sock immediately.
- Change saturated socks when conditions and the itinerary allow.
- Air feet during a suitable longer break if your guide agrees.
At Camp
- Remove boots and socks as soon as practical.
- Wash or wipe feet with clean water or an appropriate wipe.
- Dry carefully, including between the toes.
- Inspect the heels, toe pads, sides of the forefoot and around each nail.
- Put on clean, dry camp socks.
- Remove insoles and loosen boot laces to improve airflow.
- Let footwear dry naturally away from flames or intense heat.
Do not place wet boots next to an open fire or directly against a hot stove. Excessive heat can damage adhesives, leather and waterproof membranes.
What Is a Hot Spot?
A hot spot is the early stage of friction injury. It may feel like:
- Localised warmth
- Burning or stinging
- Tenderness
- Tingling
- A small area of redness
- A sensation that the sock is folded or the boot is rubbing
There may be no visible blister yet. This is the best time to act.
The American Academy of Dermatology advises stopping activity when pain, discomfort or redness develops because continuing can allow a blister to form. Its blister-prevention guidance also emphasises correctly fitted footwear, moisture-wicking socks and protection of known problem areas.
What to Do When You Feel a Hot Spot
- Tell your guide and stop at a safe location.
- Remove the boot and sock.
- Check for grit, wrinkles, moisture or a damaged insole.
- Dry the skin gently.
- Apply the tested protective tape or dressing carried in your foot-care kit.
- Adjust the sock and lacing before continuing.
- Recheck the area at the next break.
Five minutes of attention can prevent several days of pain.
Preventive Taping: Useful When Tested Correctly
If you know that one part of your heel or toe always rubs, preventive taping may help. The tape should:
- Adhere reliably to clean, dry skin
- Lie flat without wrinkles
- Have smooth edges that do not catch on the sock
- Avoid restricting circulation
- Be removed carefully if the skin becomes painful, numb, itchy or irritated
Different skin types react differently to adhesives. Test your chosen tape on training walks and check for allergic or irritant reactions.
Do not wrap tape tightly around an entire toe or foot. Swelling during the day can turn a snug wrap into a constricting band.
Powders, Lubricants and Antiperspirants
Some walkers use foot powder to manage moisture, a lubricant to reduce friction or an antiperspirant to limit sweating. These approaches can help certain people and cause problems for others.
- Too much powder can clump and become abrasive.
- Lubricant may soften adhesive tape or attract grit.
- Antiperspirant can irritate sensitive or cracked skin.
- Combining several unfamiliar products makes it difficult to identify what caused a reaction.
Choose one tested strategy based on your own training experience. Kilimanjaro should not be the first trial.
What Is a Friction Blister?
A friction blister forms when repeated rubbing causes layers of skin to separate and fluid collects between them. It can be:
- Intact and filled with clear fluid
- Blood-filled after deeper tissue damage
- Torn or already draining
- Deroofed, with the protective skin layer removed
An intact blister roof helps protect the tissue underneath. In general, do not deliberately tear it away.
Caring for a Small Intact Blister
Tell your guide or trained first-aider. The usual priorities are to:
- Clean and dry the surrounding skin
- Protect the blister from further pressure and friction
- Use an appropriate padded or hydrocolloid dressing if suitable
- Create a pressure-relieving ring around it when necessary
- Correct the sock, lacing or footwear problem that caused it
- Monitor it for leakage or infection
The NHS blister guidance recommends keeping blisters clean, covering them with a soft plaster or padded dressing and washing hands before touching a burst blister.
Should You Drain a Blister?
Do not puncture a blister casually or with improvised equipment. Opening the skin creates an entry point for infection, and treatment is more difficult in a dusty mountain environment.
A large or very painful blister may sometimes be drained by a trained person using an appropriate clean technique while preserving the roof. Whether this is suitable depends on its location, size, appearance and the climber’s medical history. Let the guide or qualified medical professional assess it rather than performing a social-media technique on yourself.
If a Blister Has Burst
- Wash or clean it gently with appropriate clean supplies.
- Allow fluid to drain without tearing away attached skin.
- Cover it with a clean, non-stick dressing.
- Protect it from further friction and pressure.
- Change the dressing when wet, dirty or loose.
- Tell your guide if pain or redness increases.
Avoid placing strong chemicals directly into an open wound unless a qualified professional has advised it.
Signs a Blister May Be Infected
Seek medical assessment for:
- Increasing redness around the blister
- Spreading warmth or swelling
- Pus or cloudy discharge
- Worsening pain rather than gradual improvement
- Red streaking away from the wound
- Fever, chills or feeling systemically unwell
- Foul odour
- Difficulty bearing weight
People with diabetes, poor circulation, reduced sensation, immune suppression or a history of serious foot wounds should seek professional advice before the climb and obtain early assessment of any skin injury.
Swollen Feet on Kilimanjaro
Mild swelling in both feet can occur after many hours of walking or standing. Heat on the lower slopes, tight footwear and individual fluid responses can contribute. A small amount of symmetrical puffiness that improves with rest is different from sudden, painful or one-sided swelling.
Do not assume all swelling is harmless or caused by altitude.
Reducing Ordinary Trekking-Related Swelling
- Begin with boots that have suitable space without being loose.
- Loosen lacing slightly if the forefoot feels compressed, while maintaining heel control.
- Remove boots at camp and allow the feet to recover.
- Elevate the feet when resting if comfortable and practical.
- Move toes and ankles gently after stopping.
- Stay normally hydrated, but do not force excessive water.
- Avoid tight socks with restrictive cuffs.
- Check for localised injury, pressure or infection.
Do not take diuretics or other medication for swollen feet unless they have been prescribed for you and your doctor has explained how to use them during the trek.
Swelling Warning Signs
Tell the guide promptly if swelling is:
- Sudden or rapidly worsening
- Much greater in one foot or leg
- Associated with redness, warmth or severe tenderness
- Accompanied by calf pain
- Causing numbness, colour change or loss of movement
- Associated with a wound or suspected infection
- Preventing normal weight-bearing
- Accompanied by facial or hand swelling, severe headache or other concerning symptoms
Chest pain, unexplained breathlessness, coughing blood, fainting or sudden one-sided leg swelling requires urgent medical attention. Breathlessness at rest on Kilimanjaro must also be treated as a possible altitude emergency rather than attributed to tiredness or swollen feet.
Numbness and Tingling Are Not Normal Fit Goals
Temporary tingling may occur when laces, socks or boots compress the foot. Stop and investigate rather than walking through it.
Check for:
- Laces that are too tight over the instep
- Socks bunched around the toes
- Two sock layers occupying too much space
- Swelling inside a previously close-fitting boot
- A folded insole
- Cold exposure
If sensation does not return after pressure is relieved and the foot is warmed, tell the guide. Persistent numbness, pale or blue skin, waxy appearance, hard skin or severe pain can indicate a cold injury or circulation problem and needs urgent assessment.
Preventing Toenail Injuries
The most common trekking-related toenail injury occurs when the toes repeatedly strike the front of the boot. Bleeding under the nail is called a subungual haematoma and may appear dark red, purple or black.
Prevention is far better than treatment.
Trim Toenails Correctly
Trim nails several days before the climb so any sensitive edge has time to settle.
- Cut straight across.
- Leave the nail level with or slightly beyond the end of the toe.
- Do not cut deeply into the corners.
- File sharp edges gently.
- Do not cut the nails extremely short.
The American Academy of Orthopaedic Surgeons recommends cutting toenails straight across without tapering the corners, leaving them no shorter than the edge of the toe. See its ingrown-toenail prevention guidance.
Secure the Foot Before Descending
Before a long descent:
- Retighten the heel and midfoot section of the boot.
- Make sure the toes still have space.
- Remove sock wrinkles.
- Use trekking poles to improve balance and control.
- Take shorter, controlled steps.
- Avoid running down loose scree unless your guide specifically directs the technique and you remain in control.
Heel-lock lacing may reduce forward movement, but it should not create numbness or pressure across the instep.
If a Toenail Becomes Bruised
Tell your guide, reduce further toe impact and assess the fit. A mildly discoloured nail with manageable discomfort may simply need protection and observation.
Urgent professional assessment is appropriate when:
- Pain is severe or throbbing
- A large area beneath the nail is filled with blood
- The nail is split, lifted or partly detached
- There is a deep cut
- The toe looks deformed
- You cannot bear weight normally
- A fracture is possible
- Redness, pus or fever develops
Do not drill, burn or puncture the nail yourself. Releasing pressure beneath a nail is a medical procedure because poor technique can cause infection, burns or further injury.
A damaged nail may loosen or fall off weeks later. New toenail growth is slow and can take many months. Protect the area, keep it clean and seek medical advice if healing is abnormal.
Ingrown Toenails
An ingrown nail develops when an edge presses into the surrounding skin. Tight footwear, trauma and cutting the corners too deeply can contribute.
Before the climb, seek professional care if a toe is already painful, red, swollen or producing discharge. Do not perform major self-treatment shortly before departure.
During the trek, report increasing tenderness around a nail early. Continued pressure can worsen the inflammation and make every step painful.
Calluses, Corns and Cracked Skin
A thin, stable callus may protect an area that regularly bears pressure. A thick or uneven callus can create concentrated pressure and hide damaged skin beneath it.
Do not cut calluses with a blade. If they are painful or recurrent, see a podiatrist well before travel.
Cracks around the heel or toes can become painful and provide an entry point for infection. Moisturise dry skin during the weeks before travel, but avoid applying heavy moisturiser between the toes immediately before walking because excess moisture can soften the skin.
Athlete’s Foot and Fungal Nail Problems
Warm, damp footwear can encourage fungal skin infections. Symptoms may include itching, scaling, cracking or soreness, especially between the toes.
If you have an active problem before departure, obtain treatment early. On the mountain:
- Dry between the toes.
- Change damp socks.
- Air footwear when possible.
- Do not share socks, towels or footwear.
- Wear camp shoes in communal washing areas when appropriate.
Do not assume every red or cracked area is fungal. Friction, contact allergy, bacterial infection and cold injury can appear similar and require different treatment.
Foot Care for Summit Night
Summit night combines cold, fatigue, darkness and many hours in the same footwear.
Before leaving high camp:
- Start with clean, dry feet.
- Inspect any existing blister or hot spot.
- Apply only the tape or dressing already tested.
- Put on the clean summit socks.
- Smooth every wrinkle.
- Confirm that toes can move freely.
- Lace the boots securely without constriction.
- Put gaiters on correctly if used.
- Keep spare dry socks protected in the daypack if your guide recommends them.
Do not use chemical foot warmers unless the product is suitable for footwear, you have tested it and your guide agrees. Warmers can create pressure, become excessively hot in a confined area or provide false reassurance while circulation is restricted.
During the ascent, report persistent numbness, severe pain or a foot that feels unusually cold compared with the other.
The Descent Is the Critical Toenail Test
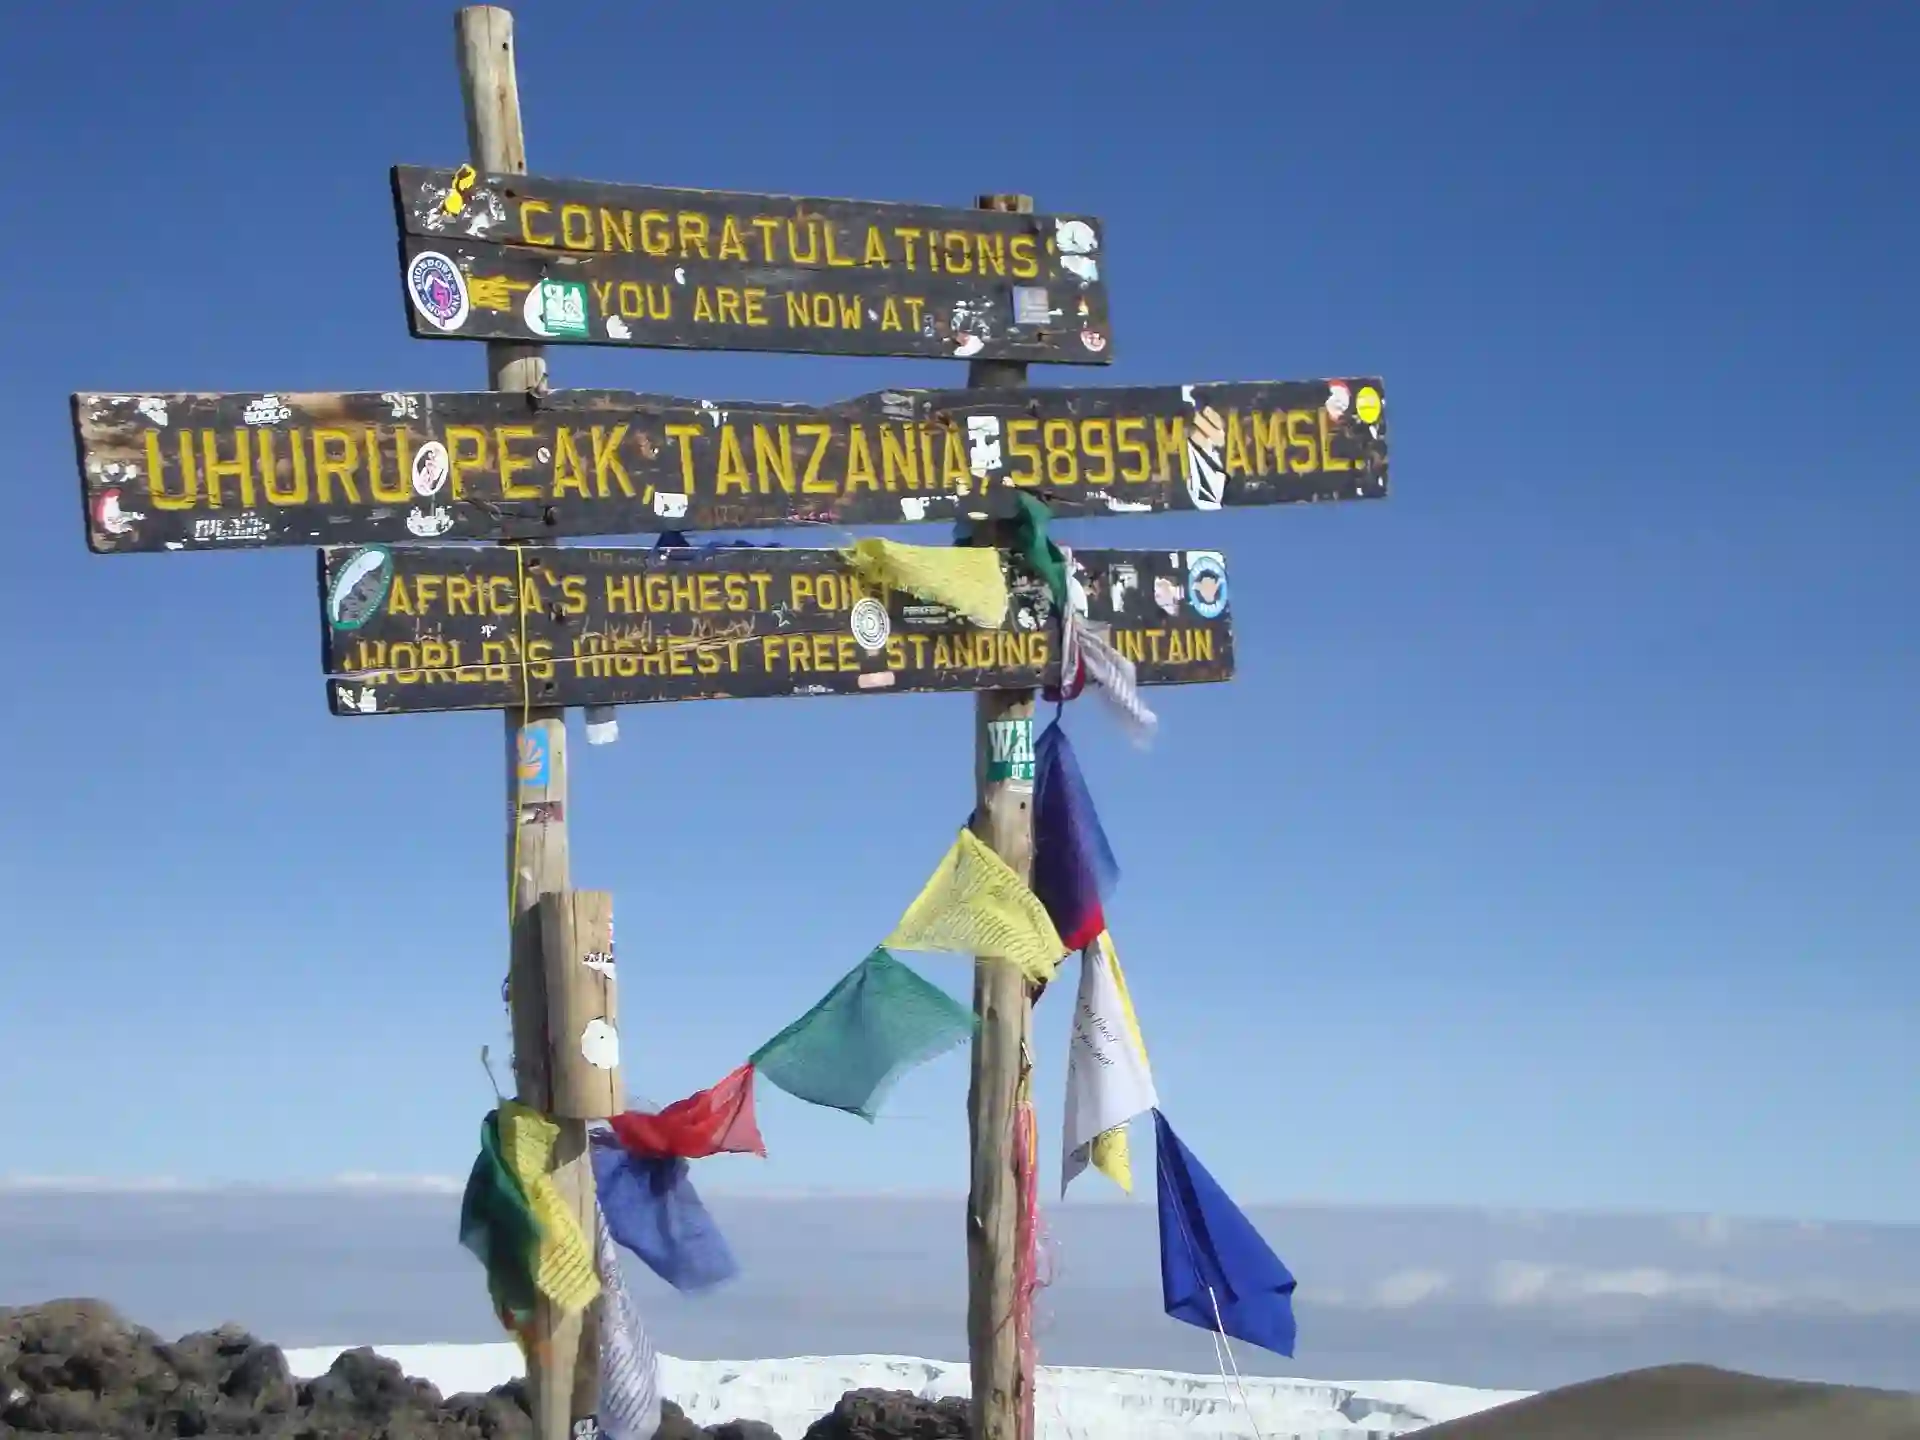
Reaching Uhuru Peak does not end the physical challenge. Climbers must descend thousands of vertical metres, often while tired.
At the crater rim or high camp:
- Reassess boot tension.
- Check whether the feet have swollen.
- Change wet socks if practical.
- Protect new hot spots.
- Tighten the heel hold before descending.
- Keep toe space free.
- Use poles and a controlled pace.
Do not remain silent because the summit has already been reached. A foot injury during descent can still require guide assistance or evacuation.
What to Pack in a Kilimanjaro Foot-Care Kit
Carry a small personal kit in your daypack rather than placing everything in the porter duffel.
| Item | Purpose | Important note |
|---|---|---|
| Tested adhesive tape | Protect known hot spots | Test adhesion and skin reaction during training |
| Hydrocolloid blister dressings | Cushion selected intact or superficial blisters | Apply to clean, dry skin and follow product directions |
| Non-stick sterile dressings | Cover an open or burst blister | Replace if wet, dirty or loose |
| Soft padding or moleskin | Reduce pressure around a tender area | Cut a relief opening rather than placing pressure directly on a blister |
| Small roll of medical tape | Secure dressings | Never wrap tightly around a toe or foot |
| Alcohol hand gel | Hand hygiene before care | Do not use as a substitute for cleaning an open wound |
| Small clean cloth or gauze | Clean and dry skin | Store in a sealed waterproof bag |
| Spare trekking socks | Replace wet socks | Keep at least one pair accessible |
| Spare boot laces | Replace a broken lace | Match the correct length before travel |
| Nail file | Smooth a sharp nail edge | Avoid major trimming during the climb |
| Prescribed foot medication | Manage a known condition | Carry in original packaging with instructions |
Your guide carries group first-aid equipment, but personal supplies allow rapid treatment of a familiar hot spot. Tell the operator before the climb about allergies to adhesives, latex or medication.
Do not pack scalpels, improvised nail-drilling tools or unprescribed antibiotics for casual self-treatment.
A Five-Minute Evening Foot Routine
Use the same sequence every day:
- Remove boots and socks.
- Clean feet gently.
- Dry carefully, especially between the toes.
- Inspect the heels, soles, toe pads and nails under good light.
- Ask whether any area felt hot, numb or pressured during the day.
- Treat hot spots before they become blisters.
- Put on dry camp socks.
- Air boots and remove insoles.
- Prepare the next day’s sock and dressing supplies.
- Tell the guide about any problem that is worsening.
This routine is more reliable than waiting for pain to force attention.
When a Foot Problem May Require Stopping or Descending
A guide considers the whole situation: the injury, altitude, weather, distance to the next camp, walking ability and whether the condition is improving.
Continuing may become unsafe when a climber:
- Cannot walk with a stable, normal gait
- Cannot bear weight on the foot
- Has spreading infection signs
- Has severe swelling or uncontrolled pain
- Has persistent numbness or suspected cold injury
- Has a significant open wound
- Is repeatedly falling because of foot pain
- Has a suspected fracture
- Cannot keep footwear on safely
Turning back for a foot problem is not failure. Continuing until a manageable injury becomes an evacuation can place the climber and support team at greater risk.
Who Should Seek Medical Advice Before Climbing?
Pre-travel medical or podiatry advice is especially important for people with:
- Diabetes
- Poor circulation
- Reduced sensation or neuropathy
- Previous frostbite or cold injury
- Recurrent severe blisters
- Bunions or major toe deformities
- Chronic swelling
- Recurrent ingrown toenails
- Active ulcers or open wounds
- Recent foot or ankle surgery
- Orthotics or significant gait problems
- Immune suppression
- A history of blood clots
Make sure the operator knows about relevant conditions while respecting your privacy. Your travel insurance should cover trekking to at least 6,000 metres, medical care, evacuation and altitude-related illness.
Common Foot-Care Mistakes
Ignoring the First Hot Spot
The earliest burning sensation is the easiest stage to manage. Waiting until the next camp can turn redness into a fluid-filled blister.
Wearing Cotton Socks
Cotton holds moisture and dries slowly. Use tested wool-blend or synthetic hiking socks.
Adding Too Many Socks for Warmth
A crowded boot can restrict circulation and increase pressure. Test the summit combination in advance.
Cutting Toenails Immediately Before Departure
Over-trimming or leaving a sharp corner can cause tenderness. Cut them correctly several days beforehand.
Using Untested Tape
An unfamiliar adhesive may fail in sweat, wrinkle or irritate the skin. Test it during training.
Puncturing Blisters With Improvised Tools
This increases infection risk. Ask the guide or trained first-aider to assess the blister.
Assuming Swelling Is Always Normal
Sudden, painful, one-sided or rapidly worsening swelling requires assessment.
Hiding Pain to Protect the Summit Attempt
Early reporting gives the guide more options. Hiding an injury allows it to worsen.
Frequently Asked Questions
How do I prevent blisters on Kilimanjaro?
Wear correctly fitted, broken-in boots; use moisture-wicking socks; keep grit and wrinkles out; change damp socks; and stop immediately when you feel rubbing or heat. Test all tape, liners and lubricants during training.
Should I tape my feet before every trekking day?
Preventive taping can help known problem areas, but routine full-foot taping is not necessary for everyone. Use a method that has worked during training and never tape tightly enough to restrict circulation.
Are liner socks necessary?
No. Some climbers find them helpful, while others experience bunching, heat or excess pressure. Test them on long walks before deciding.
Should I pop a blister on the mountain?
Do not puncture it yourself with improvised equipment. Small intact blisters are generally protected from pressure and kept clean. A large or painful blister should be assessed by the guide or trained first-aider.
What should I do if a blister bursts?
Wash your hands, clean the area gently, leave attached skin in place, cover it with a clean non-stick dressing and remove the source of friction. Report increasing redness, swelling, pus, fever or worsening pain.
Is foot swelling normal on Kilimanjaro?
Mild swelling in both feet can occur after a long walking day, but swelling should still be monitored. Sudden, severe, painful or one-sided swelling or swelling with chest pain or breathlessness requires urgent assessment.
How do I prevent black toenails?
Use boots with adequate toe room and secure heel hold, trim nails straight across, retighten laces before descents and take controlled steps. Your toes should never repeatedly strike the front of the boot.
What should I do if blood collects under a toenail?
Tell your guide and protect the toe from further impact. Severe throbbing pain, a large collection of blood, a lifted nail or suspected fracture needs professional assessment. Do not drill or burn through the nail yourself.
How many socks should I bring?
Bring enough trekking pairs for your itinerary, a clean warm pair for summit night and a clean sleeping pair. The precise number depends on the route length and drying opportunities; refer to your operator’s packing list.
Can I use painkillers and continue walking?
Pain relief can mask a worsening injury. Tell the guide first and use medication only according to appropriate medical advice and the product instructions. Do not use painkillers to force yourself onward when you cannot walk safely.
Can foot problems make a guide turn me back?
Yes, if pain, infection, swelling, loss of sensation or injury makes continued ascent or descent unsafe. The decision protects you and the mountain team.
Our Kilimanjaro Foot-Care Approach
At Tanzania Inside Safari, prevention begins during the pre-climb briefing and equipment check. We ask climbers to arrive with suitable, broken-in boots and the socks they have used during training.
During the climb, our approach includes:
- Encouraging climbers to report hot spots immediately
- Allowing safe stops for early foot-care adjustments
- Monitoring changes in walking speed and gait
- Helping distinguish ordinary discomfort from a potentially serious problem
- Using mountain first-aid procedures within the guide’s training and scope
- Protecting open wounds from dirt and further friction
- Arranging descent or medical assessment when continued trekking is unsafe
No summit is worth hiding an injury. A guide can help most effectively when the problem is reported early.
Prepare Your Feet for Kilimanjaro
Foot preparation should begin during training, not at the mountain gate. Choose the right boots, test every sock and dressing, learn how your feet respond to long descents and build a simple routine you can repeat at camp.
Tell us about your route, previous trekking experience and any history of blisters, cold feet, swelling or toenail injuries. Our local Kilimanjaro team will explain the terrain and help you check that your footwear system is suitable.
Medical disclaimer: This article provides general educational information and is not a substitute for individual medical advice, diagnosis or treatment. Consult a qualified medical professional or podiatrist before climbing if you have a health condition or persistent foot problem. On the mountain, report new or worsening symptoms to your guide immediately.